

Moving money across borders has always involved layers of complexity that most businesses shouldn't have to deal with: correspondent banks, opaque FX rates, multi-day settlement windows, fragmented compliance workflows. Stablecoins change that equation, but only if the infrastructure around them is built for real operational use.
The Lumx Dashboard is where that infrastructure becomes tangible. It's the control plane for stablecoin payment operations: where customers are created and verified, where transactions are configured and executed, where compliance is tracked, and where integrations are managed. Whether you're a product team validating a new flow, an operations team running payments, or an engineering team stress-testing an API integration, the Dashboard is where everything comes together.
This guide walks you through the full experience, from your first login to your first transaction, with every section of the Dashboard explained in context.
If you're looking for a higher-level overview of what the Dashboard enables, check the product overview. This article focuses on execution.
Who this guide is for
Product teams testing stablecoin flows
Operations and finance teams running payments
Engineering teams validating APIs, webhooks, and edge cases
Compliance teams reviewing KYC/KYB and audit trails
You don't need blockchain expertise. You just need to know how money should move.
1. Accessing the Dashboard — Login & Security
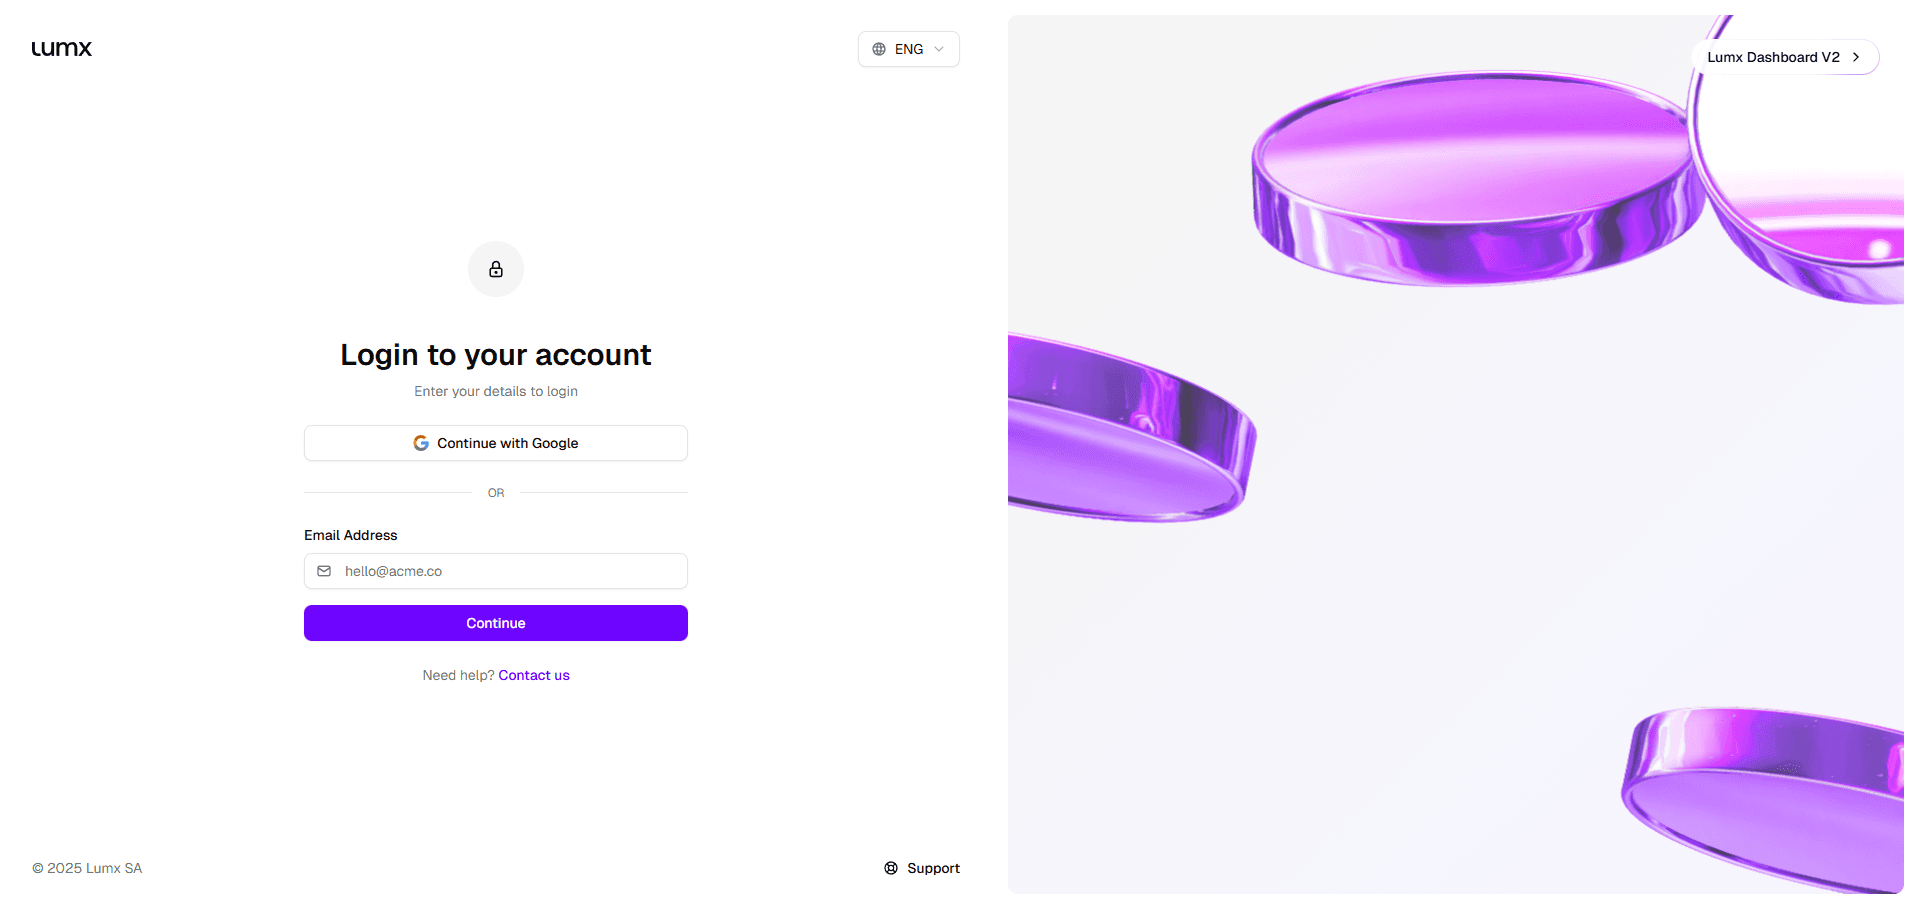
The Lumx Dashboard uses passwordless authentication combined with 2FA, reducing credential risk while keeping access fast.
Step-by-step:
Go to the Lumx Dashboard login page
Enter your email
Click the magic link sent to your inbox
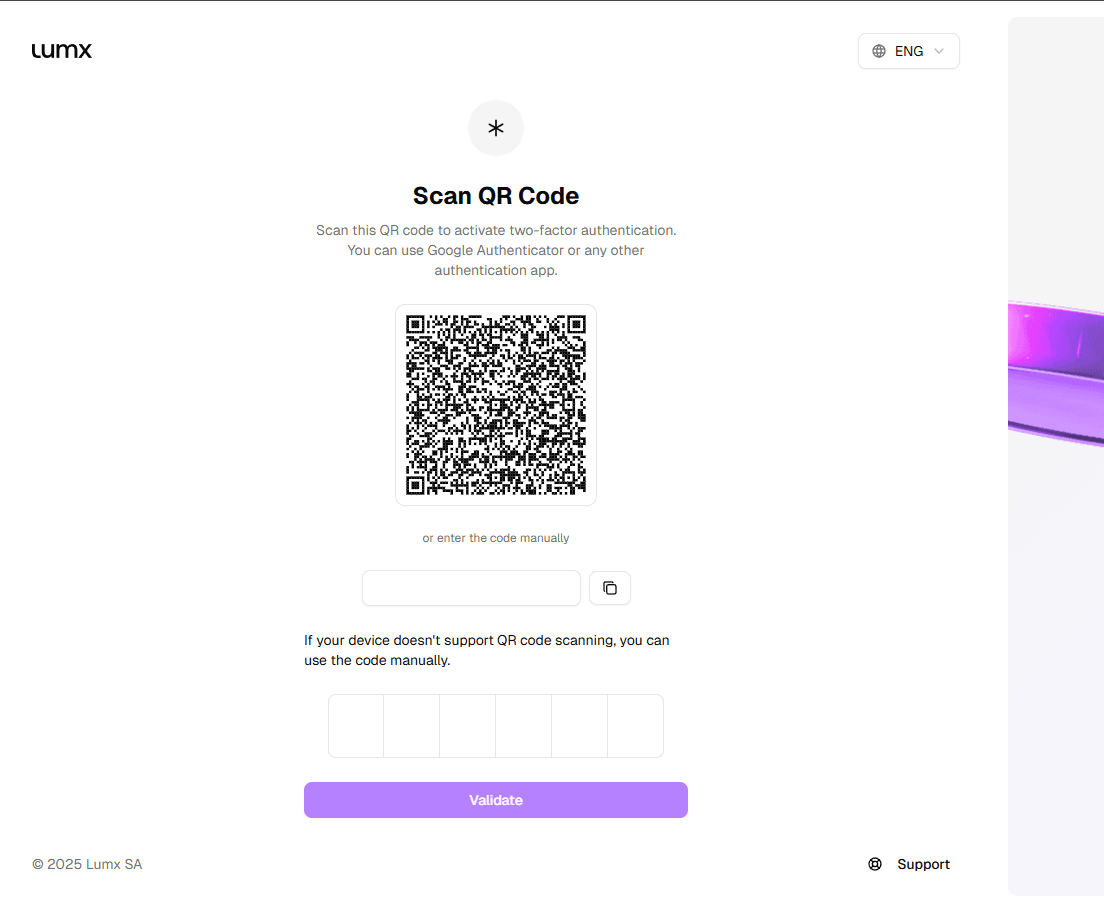
Complete the 2FA verification using Google Authenticator or any compatible app
Magic link authentication removes passwords entirely, reducing exposure to phishing and credential leaks, a meaningful default for teams handling financial operations.
2. Creating your Organization, Workspace, and Chain
After login, you'll complete a short setup flow that defines who you are and how your environment is structured. This only happens once, and it sets the foundation for everything else.
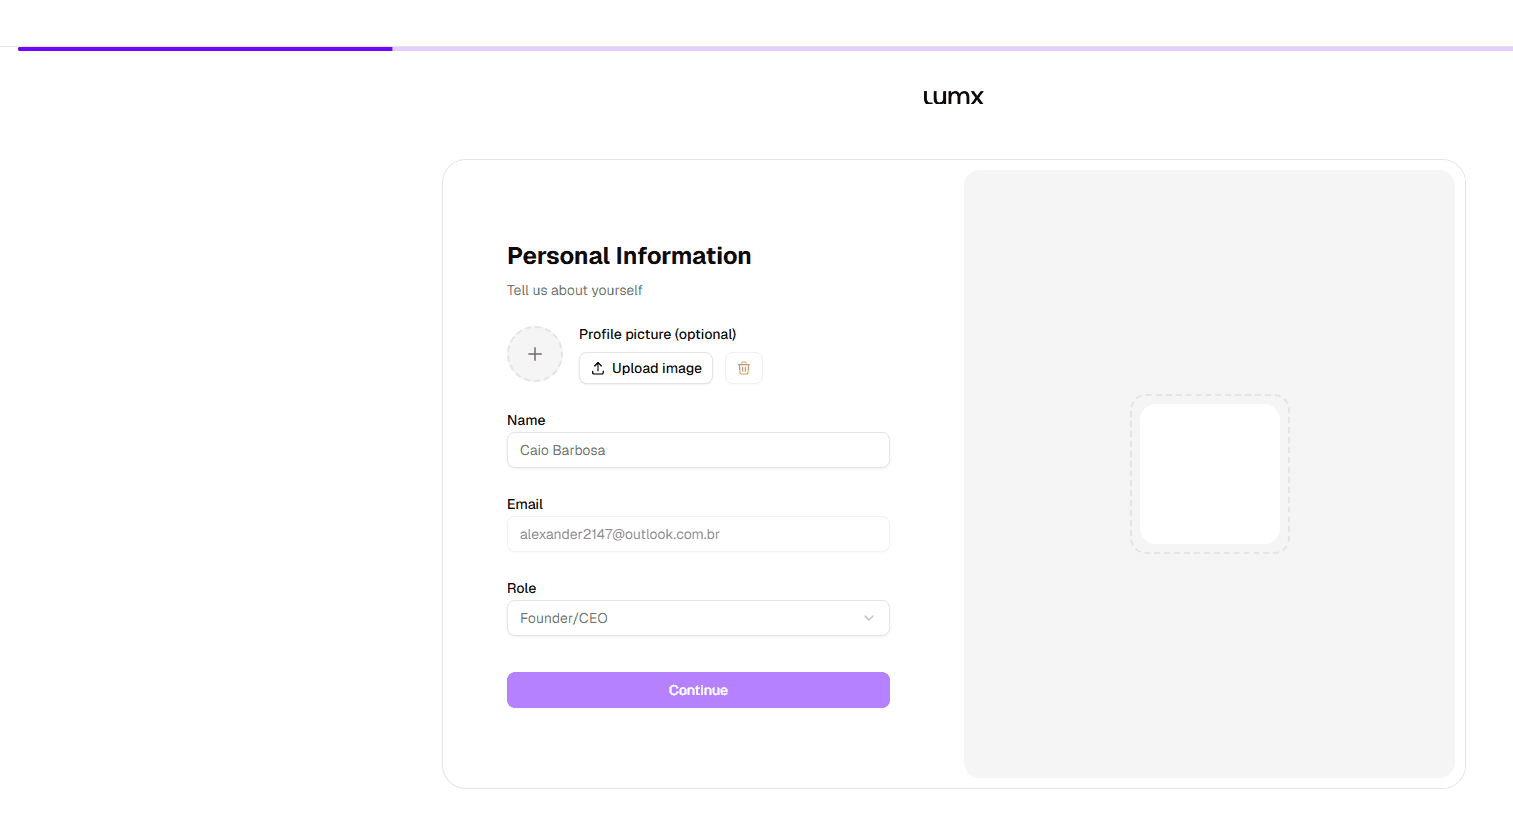
Personal Information
First, you'll confirm basic personal details used for access control, auditability, and security — name, role, and optionally a profile photo.
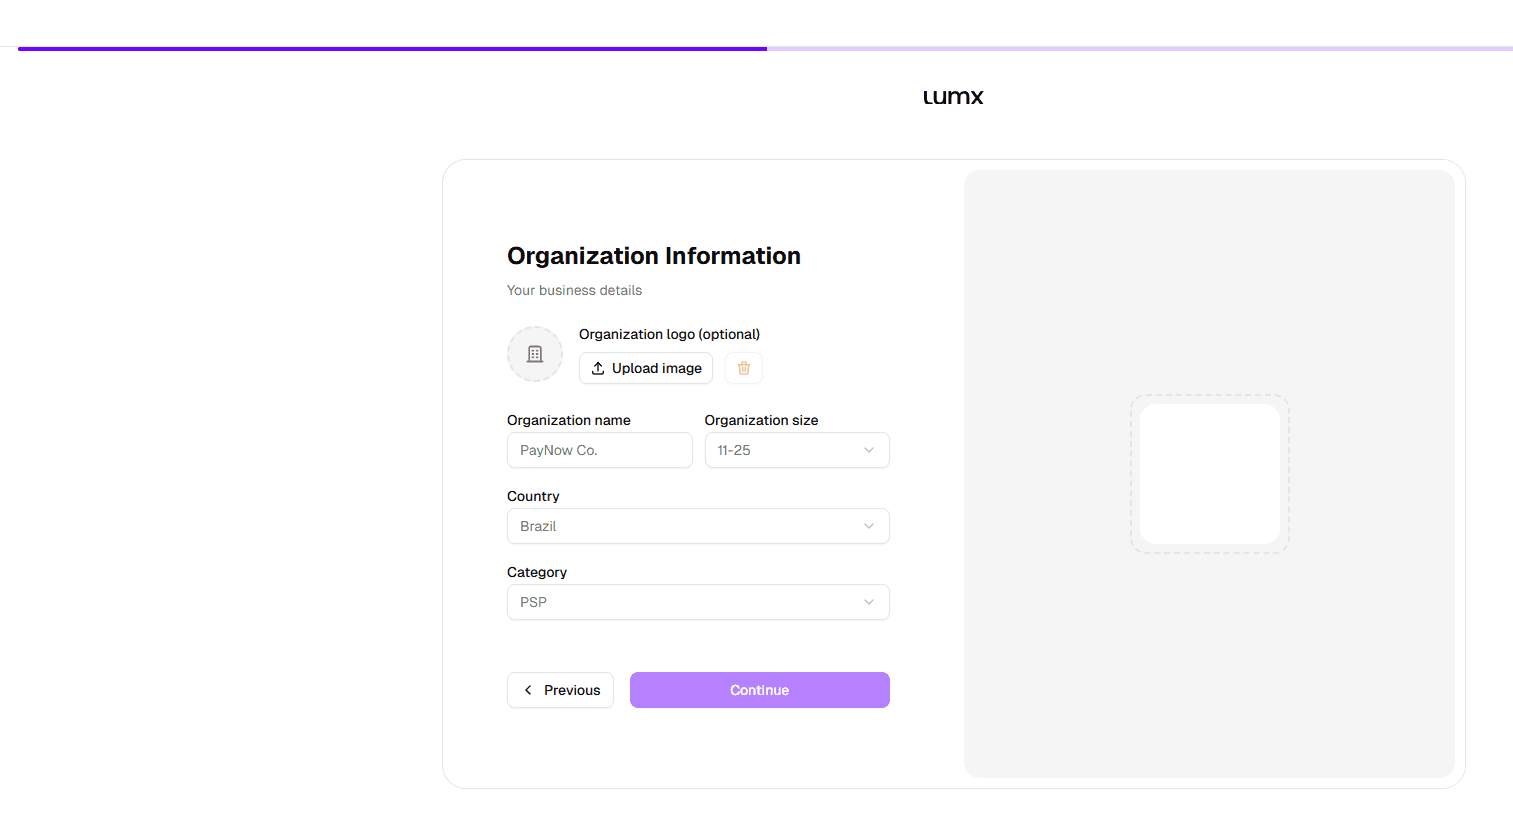
Organization
The Organization represents the legal entity operating on Lumx. You'll add basic organizational information here, company name, size, country of incorporation, and category.
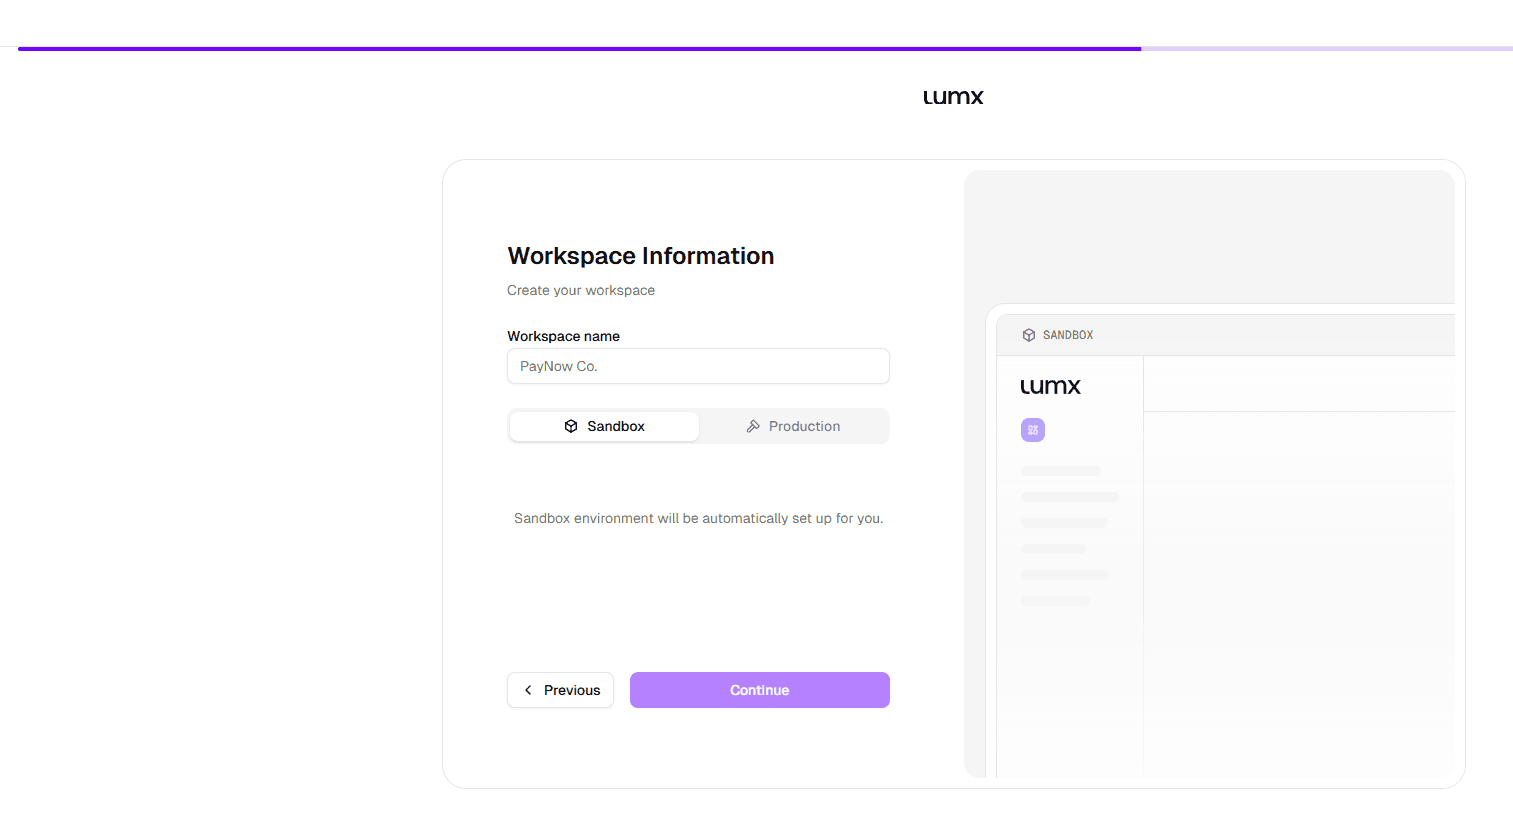
Workspace
A Workspace is an operational environment, think of it the way you'd think of environments in cloud infrastructure. It isolates balances, customers, and permissions.
By default, all accounts start in Sandbox, allowing teams to test flows and simulate transactions safely before going live.
Production access requires approval and guided onboarding. More on that at the end of this guide.
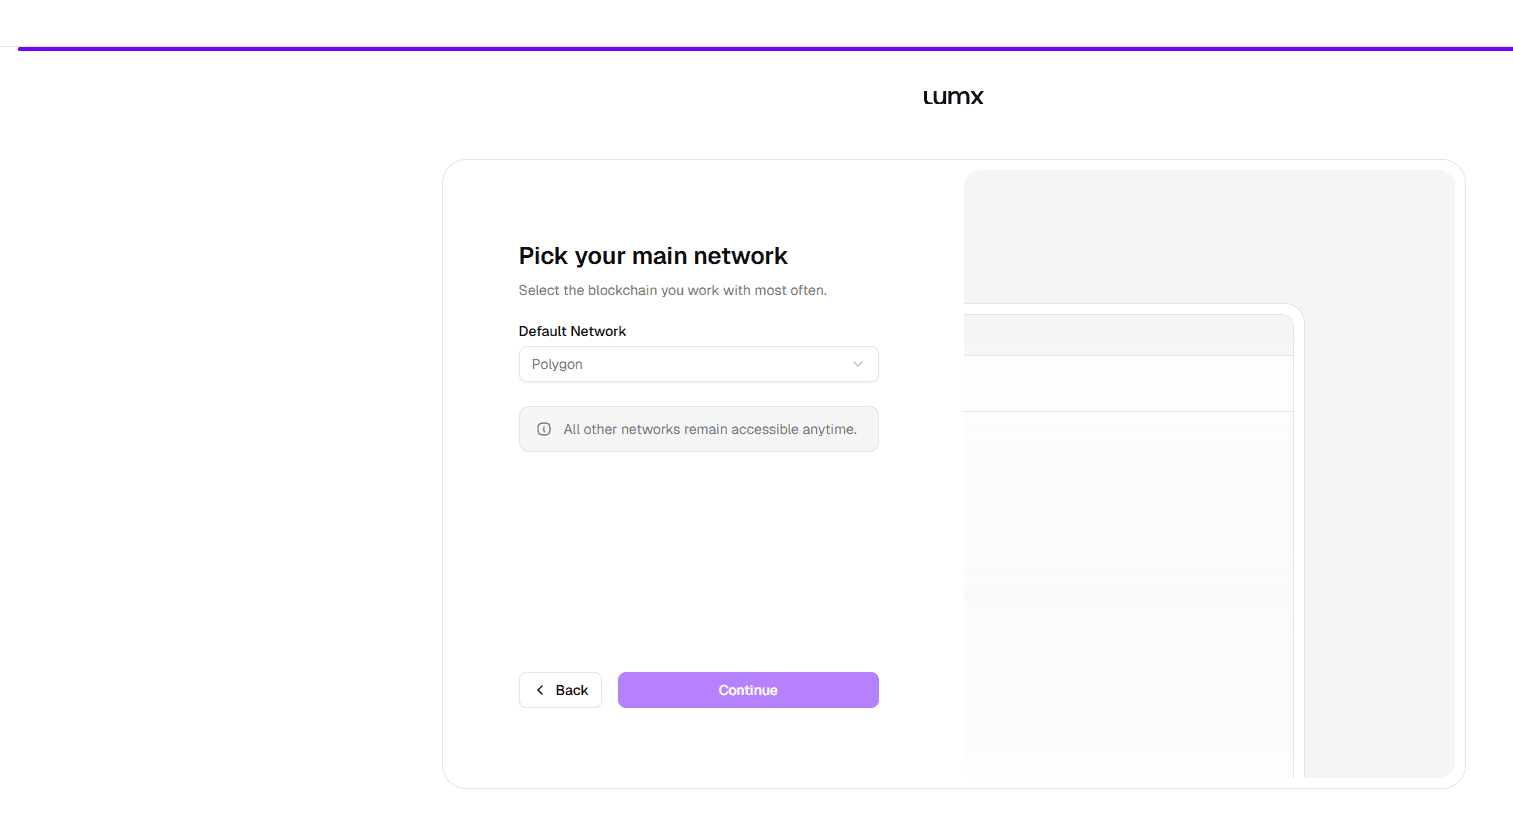
Chain
Chain selection defines the blockchain execution environment for stablecoin operations. All supported chains are available at any time:
Ethereum
Polygon
Base
Tron
You're not locked into a single chain, additional Workspaces with different chains can be created at any time.
3. Overview — What you see first
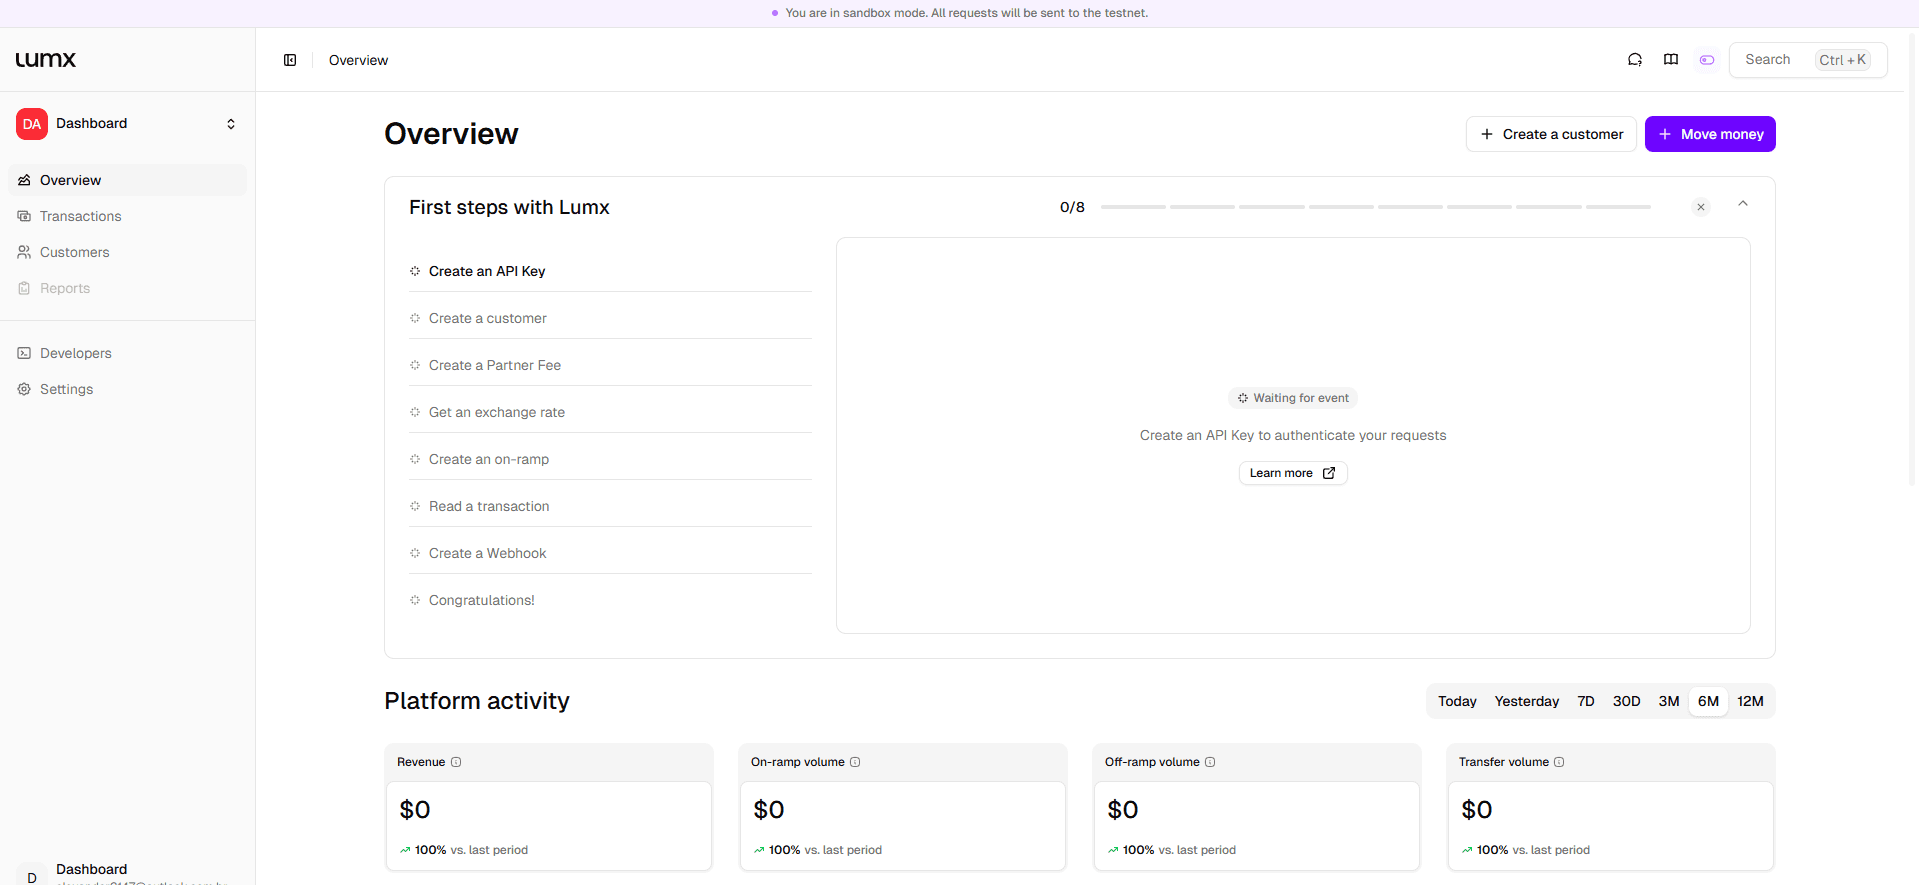
Once setup is complete, you land on the Overview page. This is your real-time operational snapshot.
Here you'll see:
Total balances by currency
Recent transactions
Active customers
Wallet activity
You'll also find First steps with Lumx, a built-in checklist that guides you through the main actions directly from the interface: creating customers, getting exchange rates, moving money. It's a quick, contextual guide inside the product that helps teams progress step by step.
This article complements that experience by explaining each area of the Dashboard in more detail and showing how everything fits together.
Everything you see in the Lumx Dashboard can be tested safely in Sandbox. The Sandbox environment mirrors Production, without the risk.
4. Developers — API Keys, Webhooks, and Operational Visibility
This section is where you set up the technical foundations to operate on Lumx. Even if your team doesn't plan to use the API directly, this is worth understanding, because the infrastructure you configure here affects everything downstream.
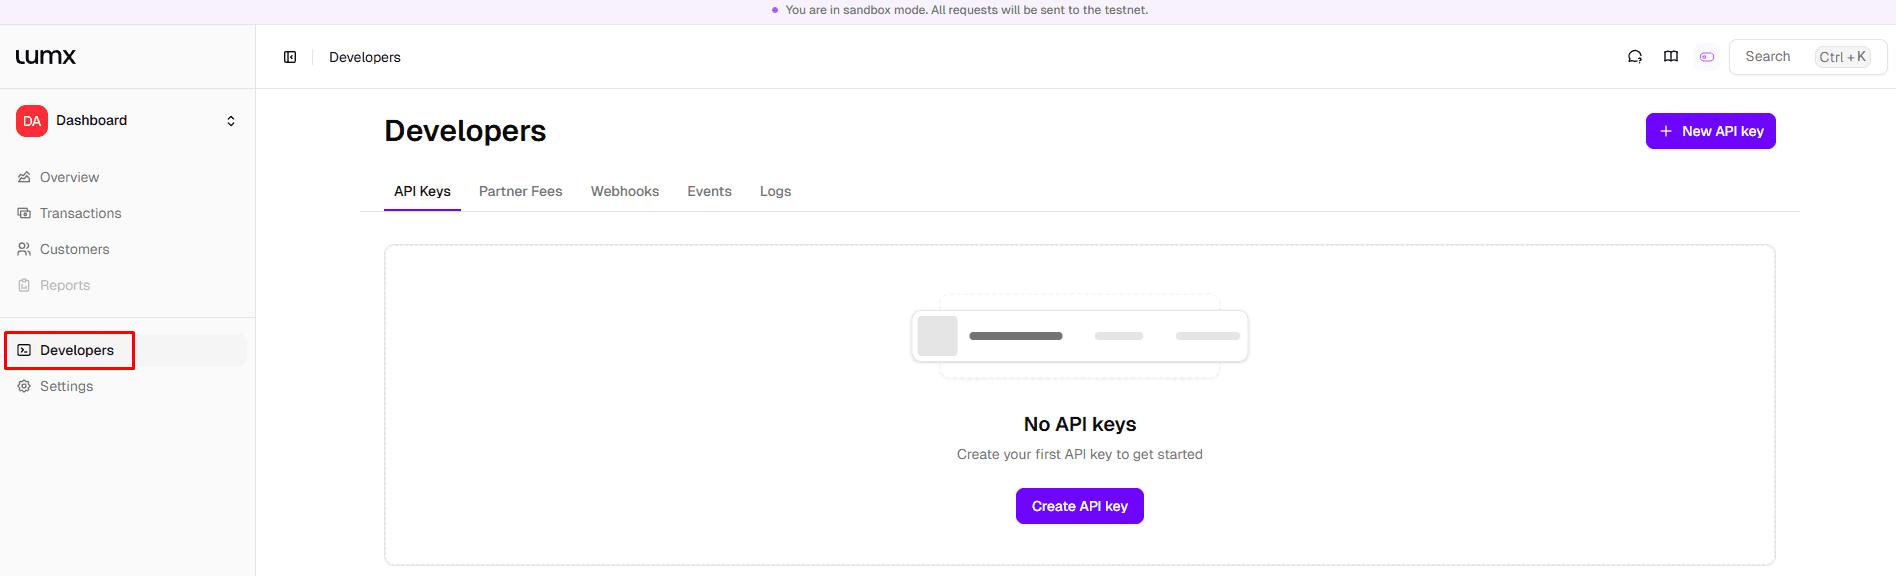
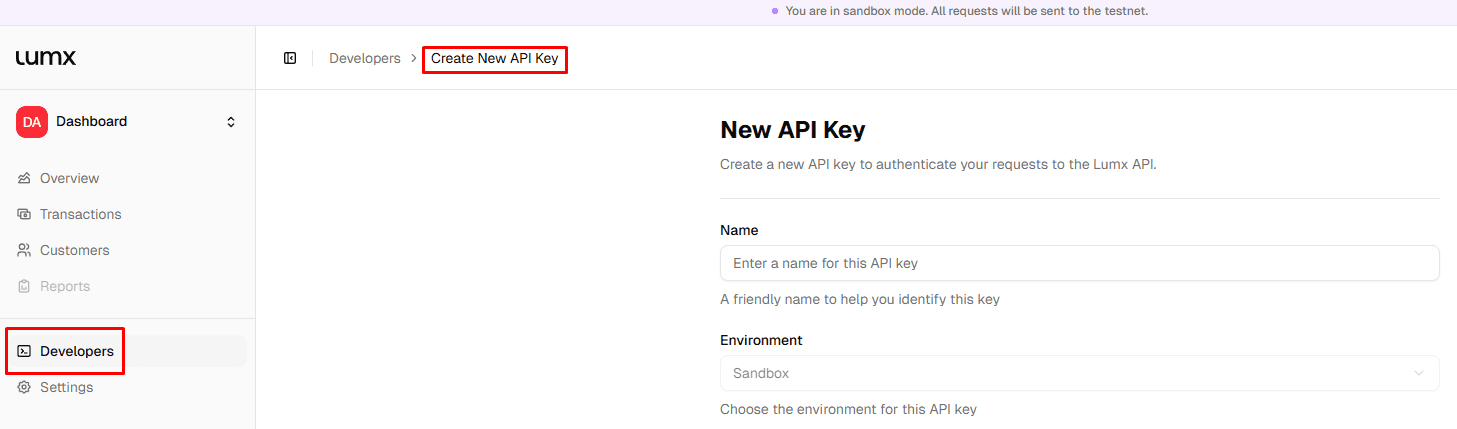
API Keys — Creating access to operate
API keys are required only when operating Lumx programmatically via API. If your operation is managed entirely through the Dashboard, creating an API key is not required.
That said, even API-based integrations start here. From this section, you can:
Create and manage API keys
Keep Sandbox and Production credentials separate
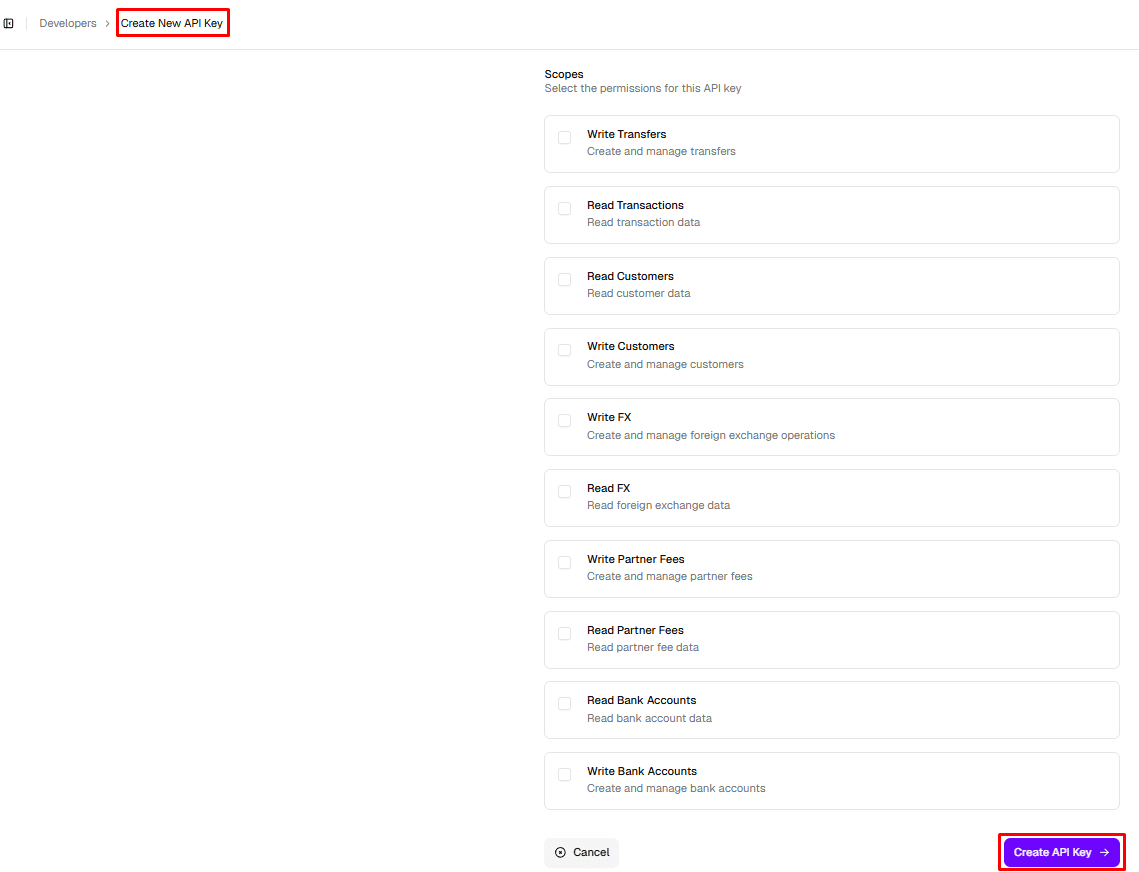
Define scopes, controlling which actions each key is allowed to perform
Scopes let you restrict access by capability, for example, read-only vs. execution, improving security and operational control.
After creating an API key, you'll see its environment (Sandbox or Production), the secret (shown only once), and the assigned scopes. Store the secret securely before leaving the screen.
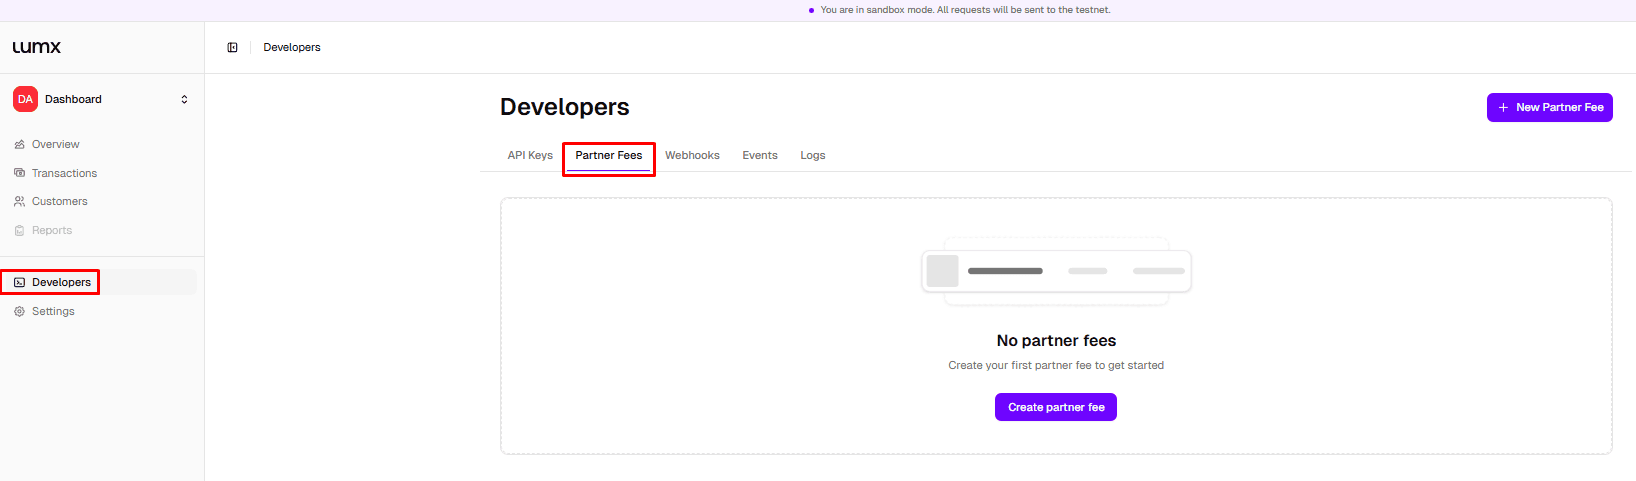
Partner Fees — Monetizing transactions
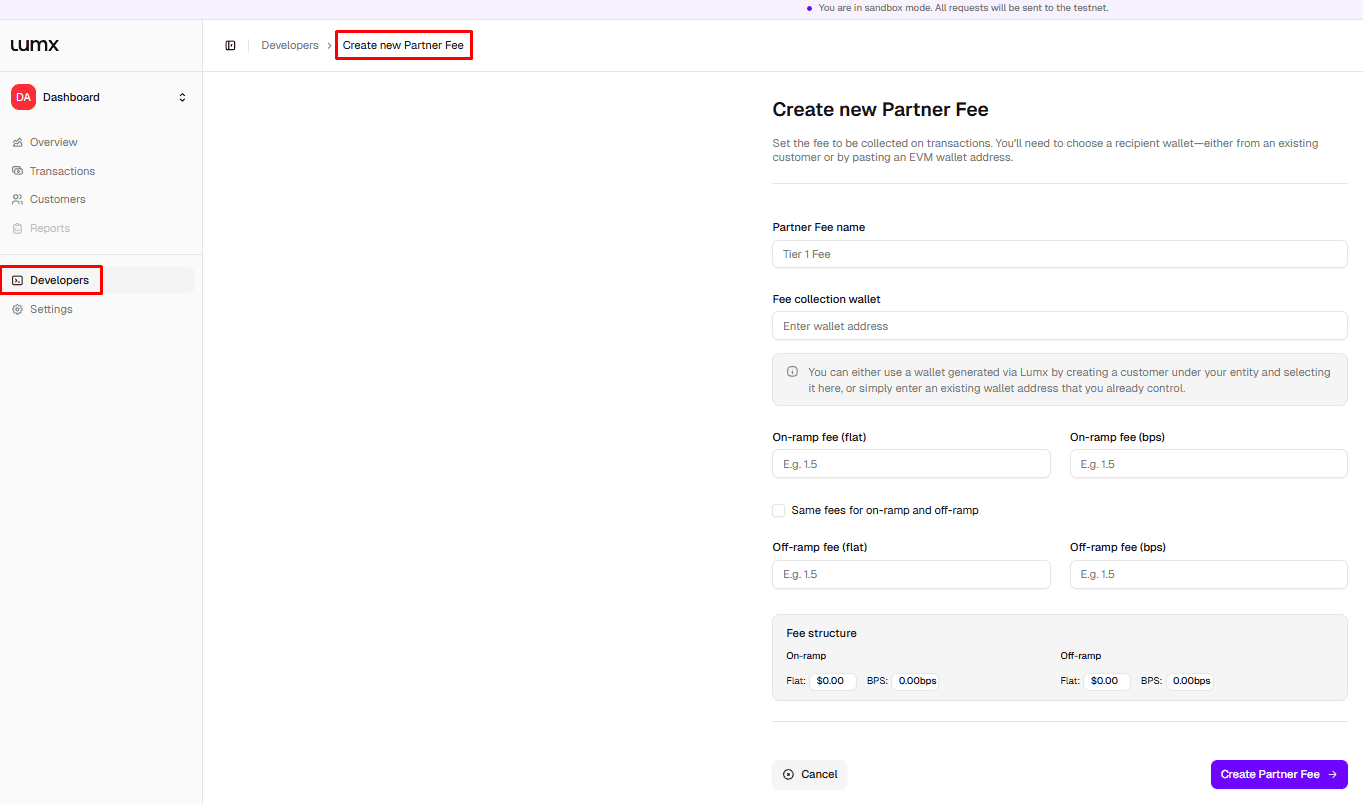
Partner Fees allow you to monetize transactions processed through Lumx. When creating a Partner Fee, you'll define:
Name — internal identifier for the fee
EVM address — where collected fees will be sent
Fee type:
Percentage (bps), applied proportionally to the transaction value
Flat fee — fixed amount per transaction
You can create different fees for On-Ramp and Off-Ramp operations, depending on your business model. Once created, the fee becomes active immediately and is automatically applied to eligible transactions.
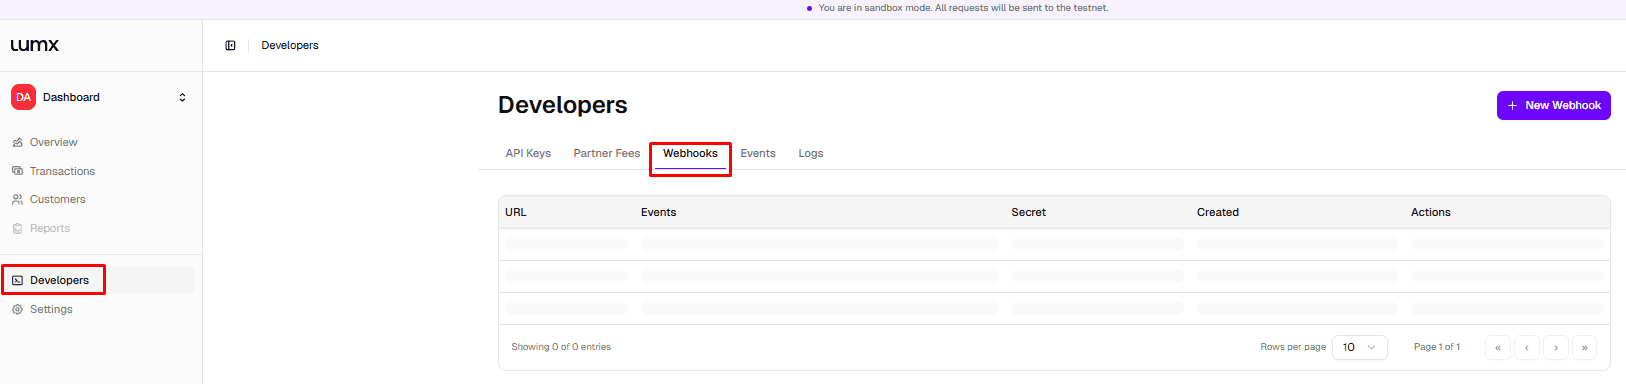
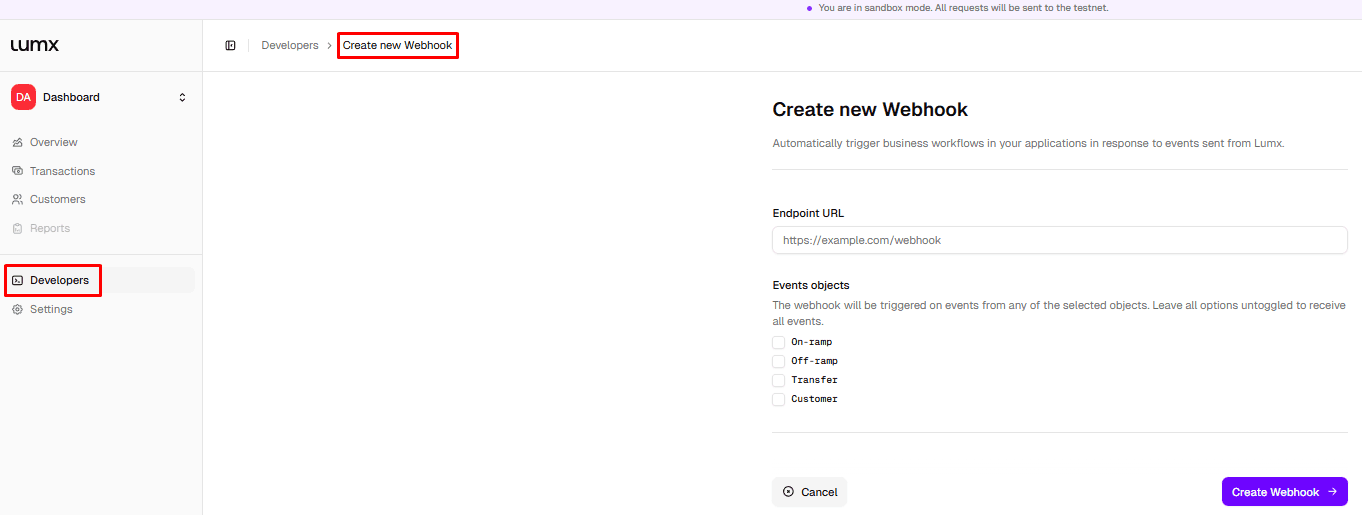
Webhooks — Real-time event delivery
Webhooks allow your systems to receive real-time updates about what happens inside Lumx. From this section, you can:
Register webhook endpoints
Subscribe to specific event types (On-ramp, Off-ramp, Transfer, Customer)
Monitor delivery attempts and failures
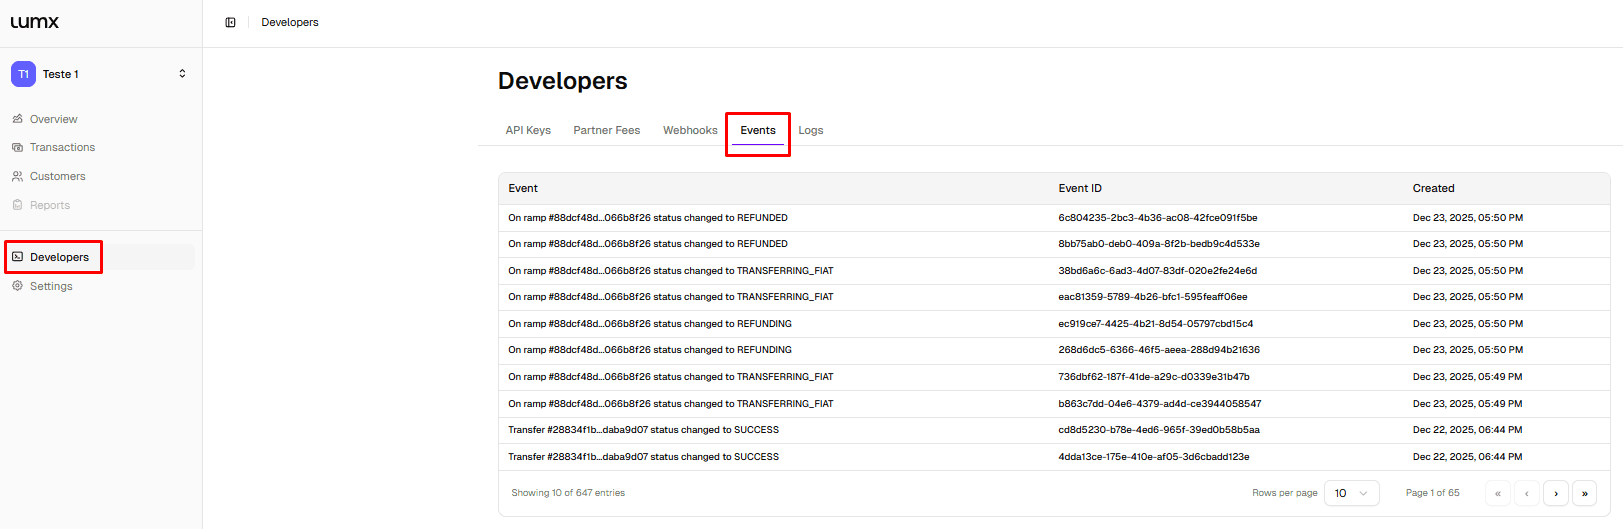
Events — Chronological activity log
The Events section provides a chronological view of everything that happens across your account, transaction lifecycle events, customer activity, wallet and rail-related actions.
This view is especially useful when validating flows in Sandbox or investigating unexpected behavior in Production.
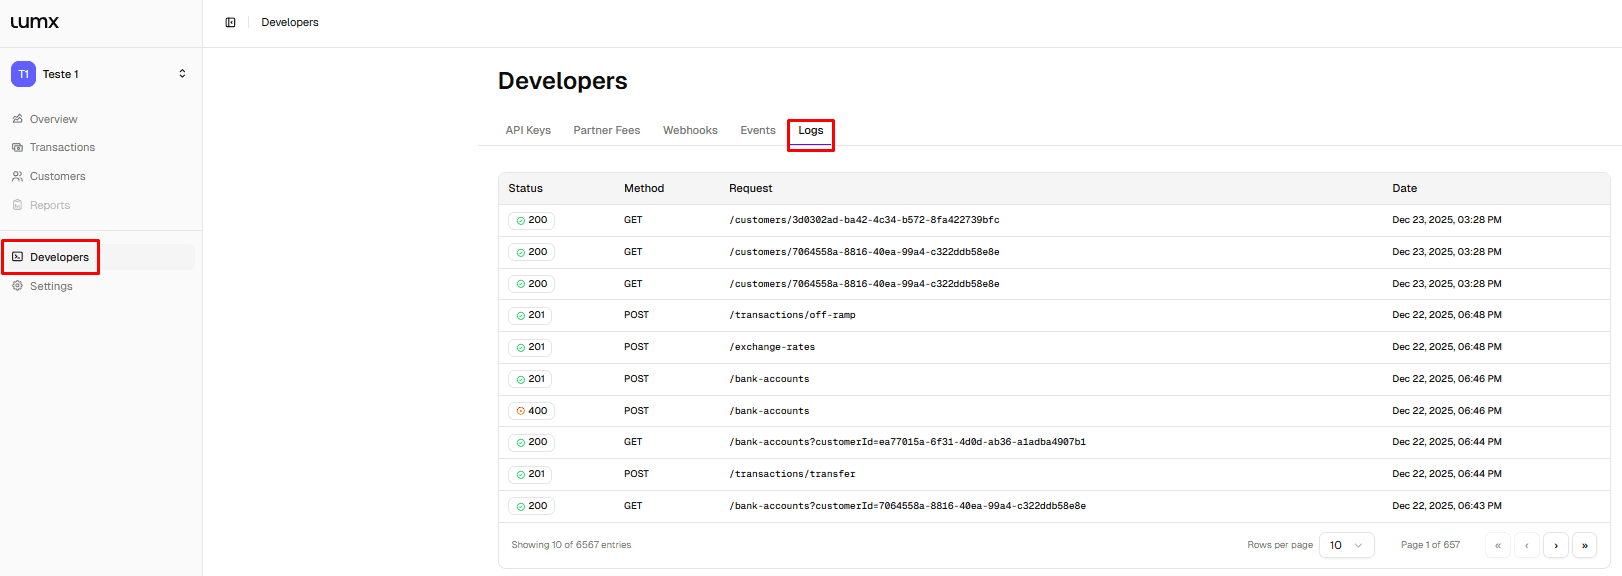
Logs — Technical request history
Logs offer a detailed record of requests and actions performed within the platform, including endpoint, method, status code, and timestamp. They're typically used to:
Debug integrations
Investigate errors or edge cases
Support internal audits and compliance reviews
As operations scale, Logs become an essential tool for maintaining operational reliability.
The Developers section makes stablecoin operations observable, auditable, and extensible — regardless of whether you're operating via Dashboard or API.
5. Settings — Access, Structure, and Collaboration
Before moving into Customers and Transactions, it's worth understanding Settings — the section where you manage the structure you've just created and prepare for the teams that will operate inside it.
Settings is organized into four tabs:
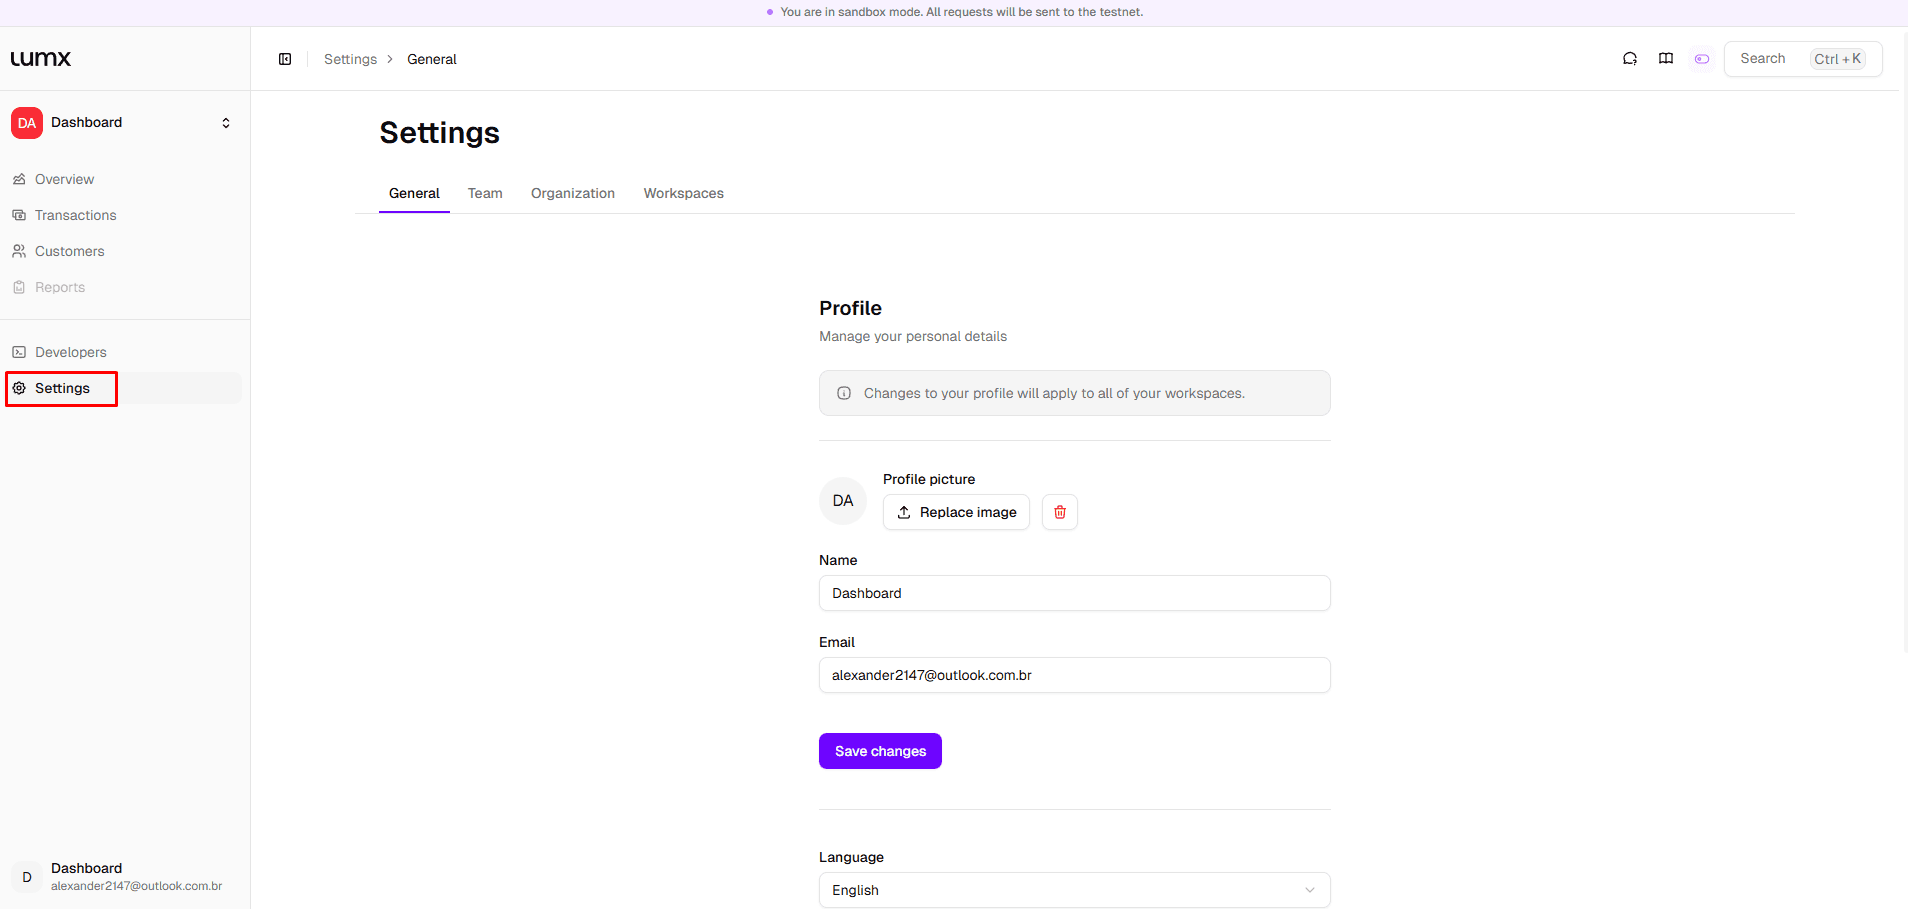
General
Basic profile and environment settings, workspace name, profile photo, linked email, language, and theme (Light or Dark).
Team
Add users and control their access level. Two roles are available:
Member — read-only access; can view information but cannot execute actions
Admin — full access; can execute transactions, create customers, and manage all configurations
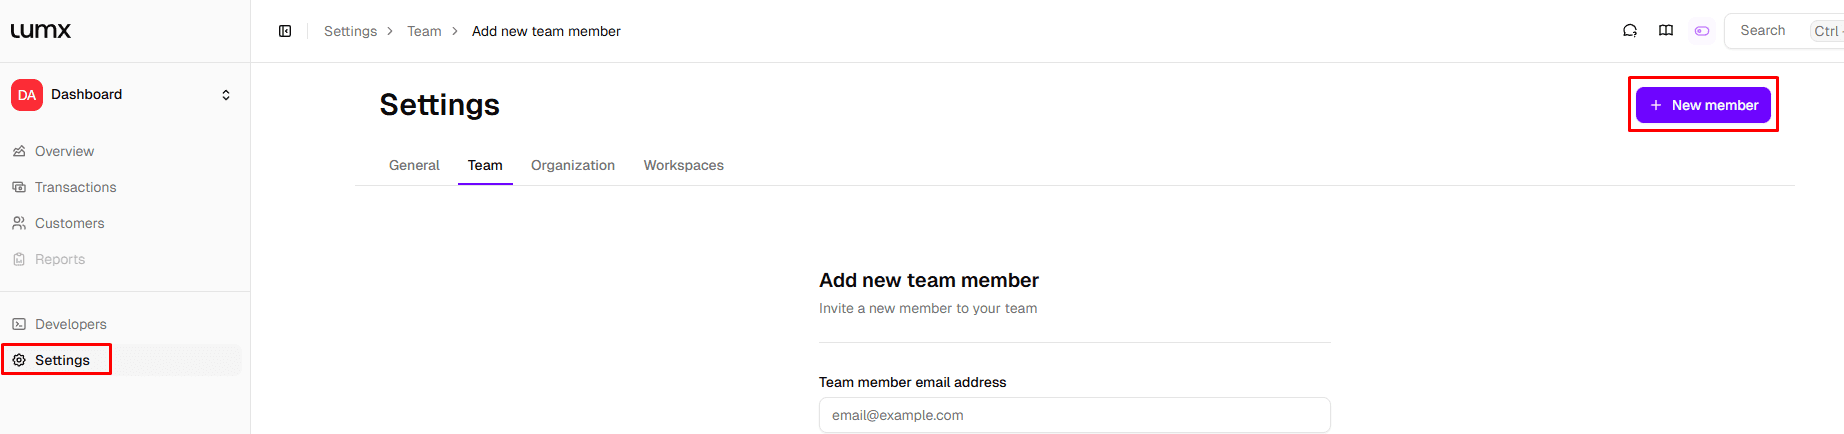
To add a new team member, click New member in the top right corner, fill in their email, name, and role, and confirm.
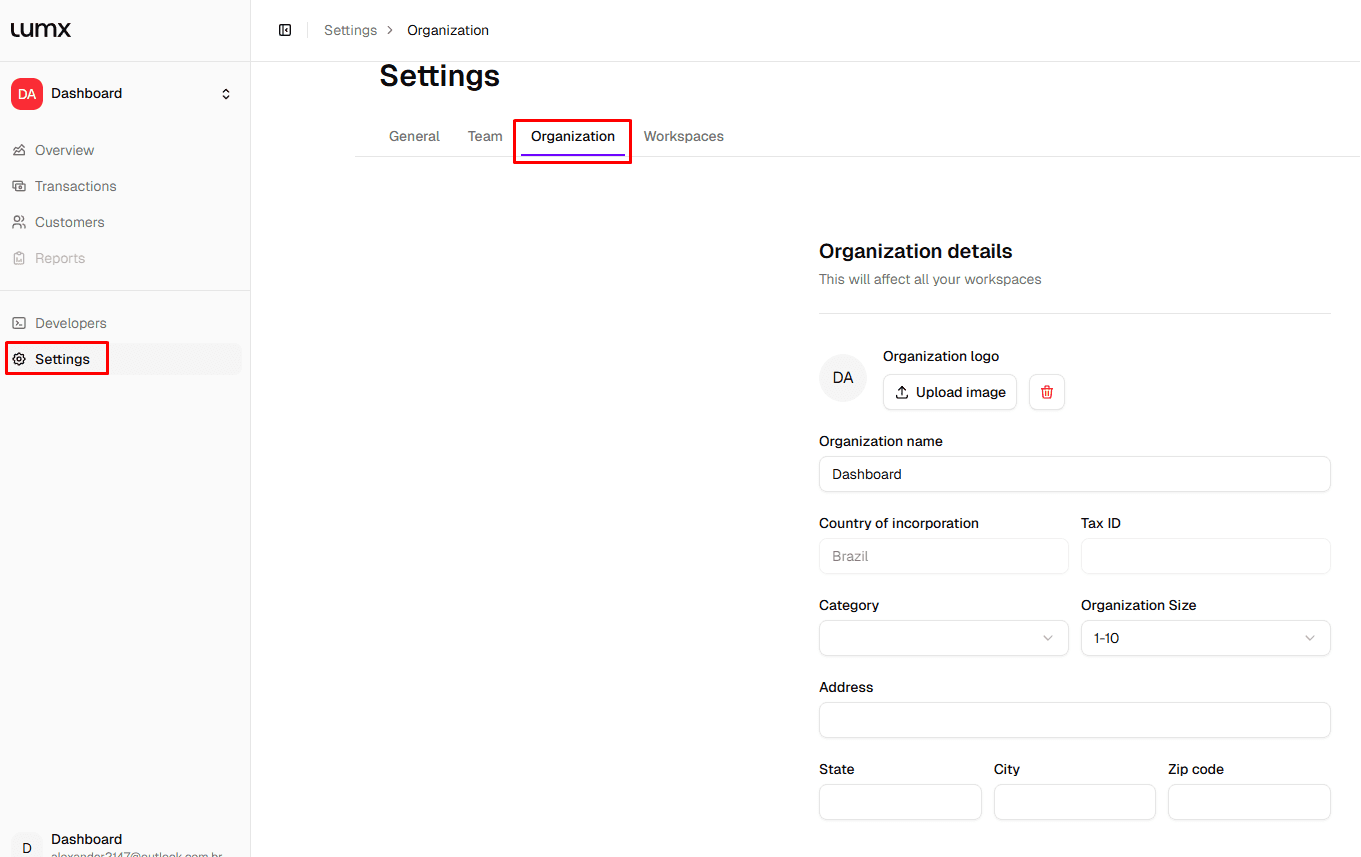
Organization
Legal entity and compliance-related information, company name, Tax ID, country of incorporation, address, and size. Changes here apply across all workspaces.
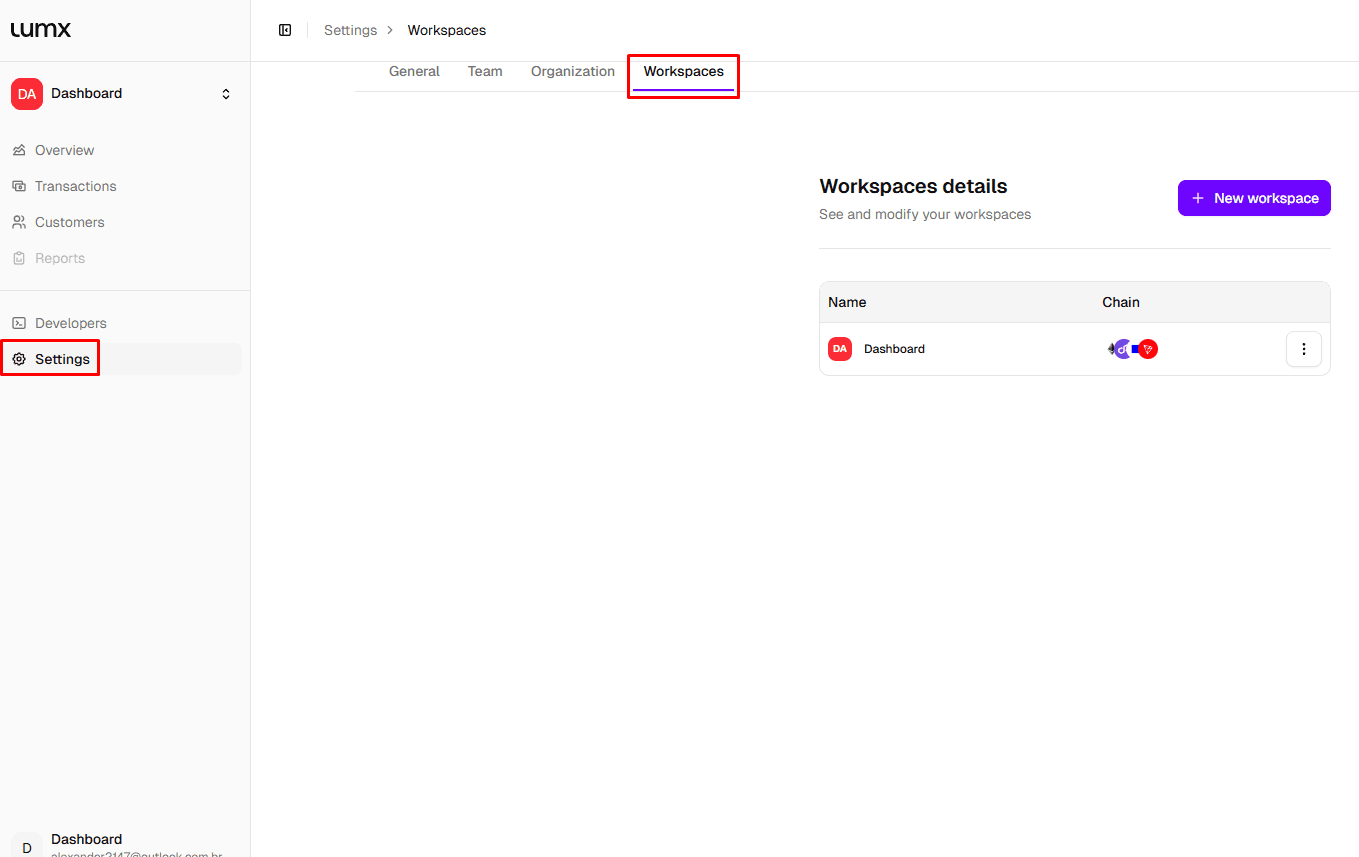
Workspaces
View and edit existing workspaces, or create new ones. Each workspace can be tied to a different blockchain, allowing teams to operate across multiple networks independently.
Most teams return to Settings when adding new collaborators, separating responsibilities between ops, finance, compliance, and engineering, or preparing for production onboarding.
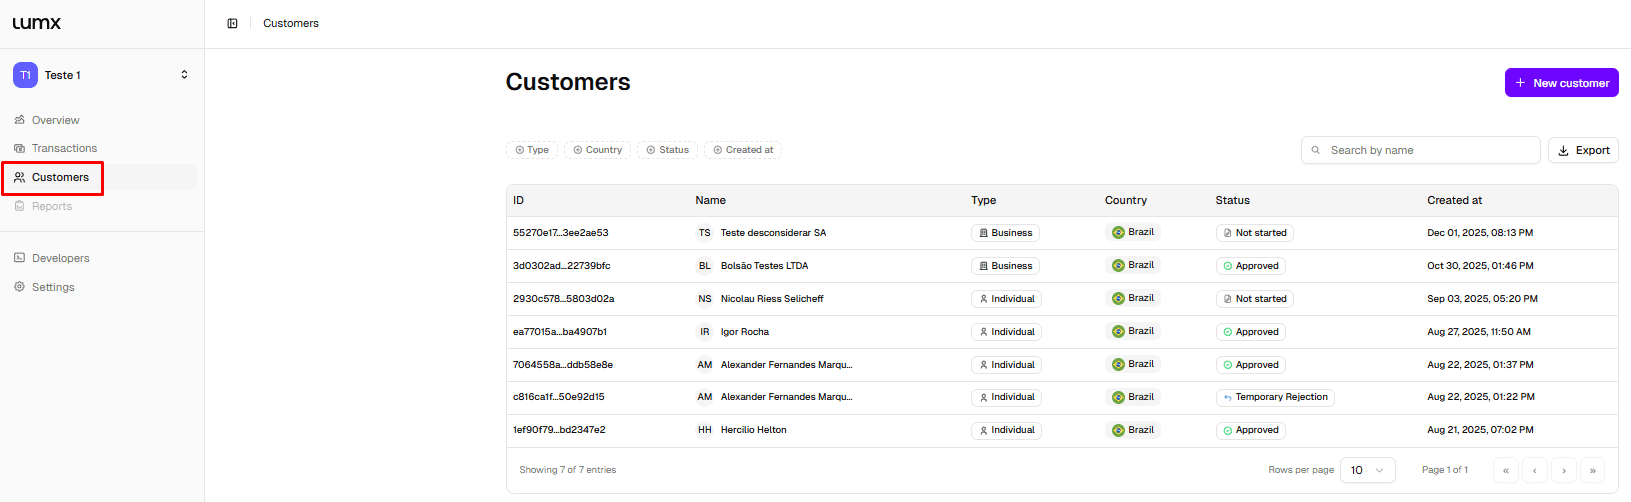
6. Customers — Creating and Managing Operational Entities
Customers are the core operational entities inside Lumx. Every wallet, transaction, and payment flow is always associated with a customer.
A customer can represent:
A business
An individual
A supplier, partner, or platform user
Creating a Customer
Creating a customer is the first operational step. Click New customer in the top right corner of the Customers screen. You'll define:
The entity type (Individual or Business)
Basic identification information (name, email, Tax ID, date of birth for individuals)
Jurisdiction
Once created, the customer becomes the central reference for wallets, transactions, and compliance.
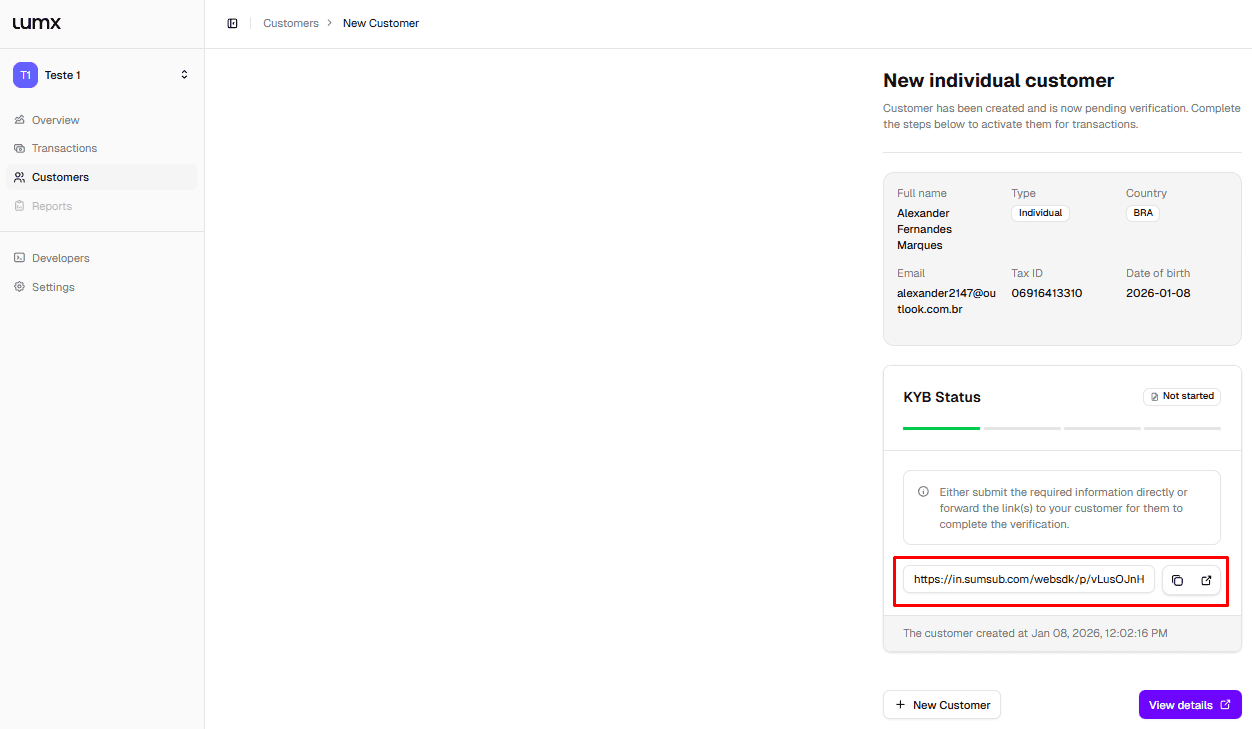
KYC / KYB — Verification Flow and Status
After creation, you'll see the customer profile with their current verification status, previously submitted information, and a direct link to complete KYC/KYB via Sumsub.
The Sumsub form can be completed in two ways:
By the workspace owner, if all information and documents are available
By the end customer, by sharing the secure Sumsub link directly with them
Lumx supports two levels of KYB verification, depending on the currencies your customer will operate with:
Standard KYB — required for BRL and MXN operations. Covers company information, core documents (Articles of Association, Register of Members and Directors), legal representative, and UBOs above 25% ownership. Verification SLA: 2 business days.
Extended KYB — required for USD and EUR operations. Includes all Standard fields plus additional documents (Proof of Address, AML practices, Income Statement), an expanded business questionnaire, and deeper scrutiny of source of funds and counterparties. Verification SLA: 3 business days.
The KYB form covers four main areas: company information and documents, corporate shareholders (if applicable), legal representative, and Ultimate Beneficial Owners. A business questionnaire — covering expected monthly volume, operating countries, and business description, is required for all customers.
For a full breakdown of required fields, documents, and restricted jurisdictions, see the KYB Quick Reference guide.
Verification statuses:
Status | Meaning |
Not started | Customer created, but the Sumsub form has not been initiated |
Temporary rejection | Information or documents were incomplete or incorrect and need to be resubmitted |
Final rejection | Entity was rejected and cannot continue the KYC/KYB process |
Approved | Customer cleared and allowed to operate |
Sandbox vs. Production Behavior
In the Sandbox environment, customers are automatically set to Approved, allowing teams to test the full transaction flow without completing the verification process.
In Production, KYC/KYB approval is mandatory before any real operation can take place. This ensures fast testing while preserving full compliance in live environments.
Customer Profile and History
Each customer has a dedicated profile showing identity and verification data, linked wallets, transaction history, and compliance events. This creates a single source of truth for operations, compliance, and audits.
A customer is the operational anchor that connects identity, compliance, and money movement. No transaction runs without one.
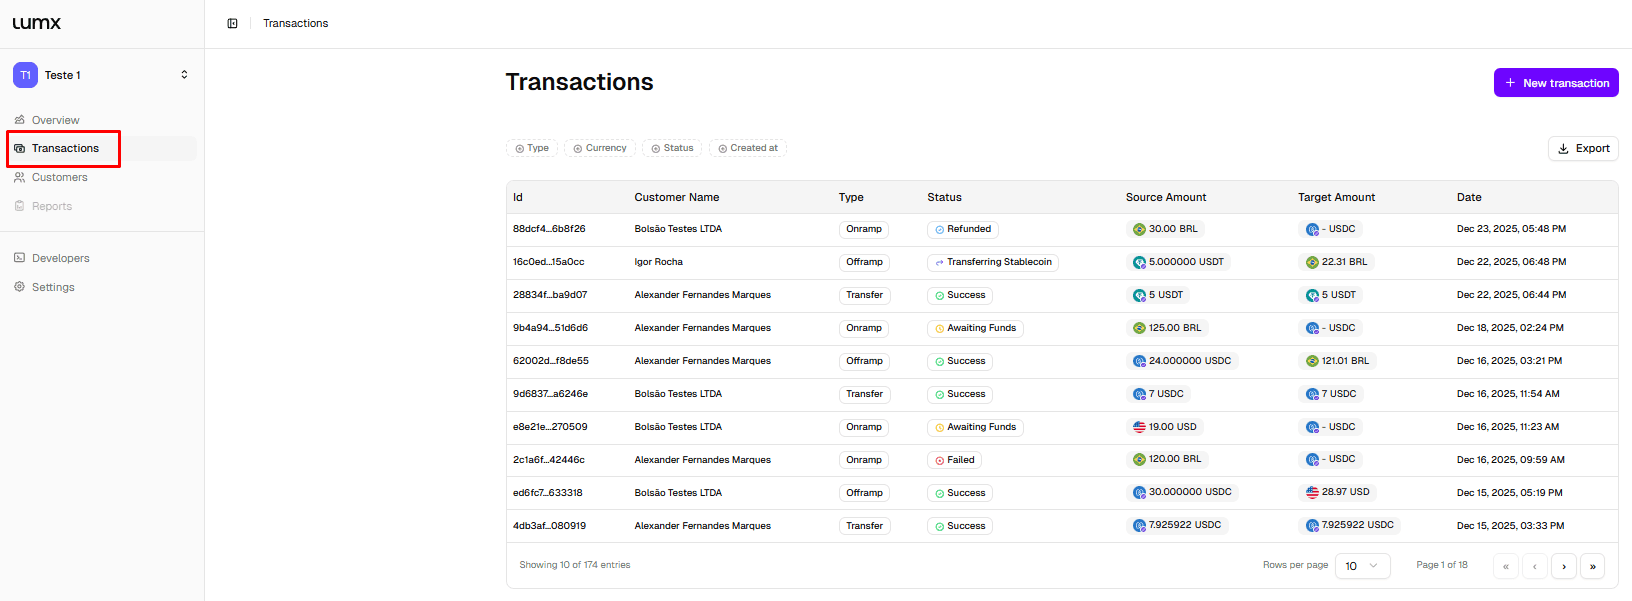
7. Transactions — Moving Money Inside Lumx
Transactions are the core action inside the Lumx Dashboard. They represent how money is configured, executed, and tracked, from fiat or stablecoin origin to final settlement.
Every transaction is always associated with a customer, a wallet (stablecoin) or bank account (fiat), and a blockchain network and/or fiat rail.
Transaction Types
Lumx supports three transaction types:
On-ramp — Fiat → Stablecoin
Off-ramp — Stablecoin → Fiat
Transfer — On-chain stablecoin movement between customers or to an external wallet
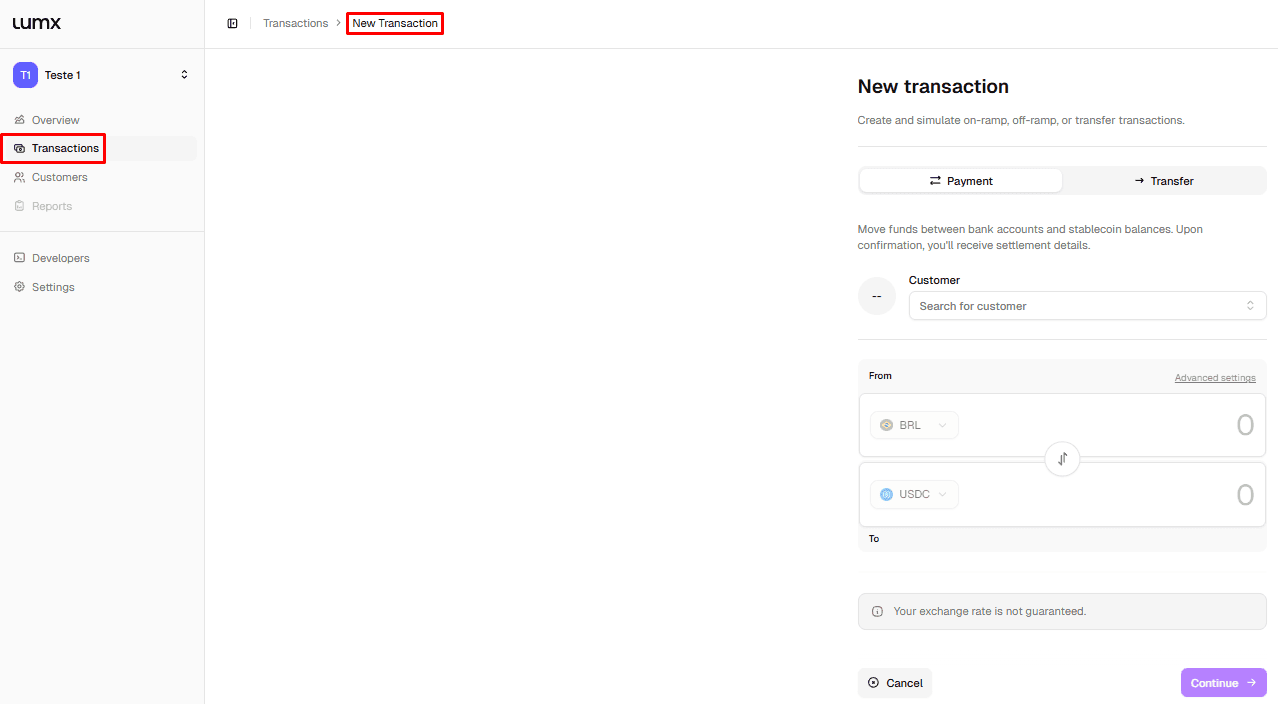
Creating a Transaction
To create a transaction, click New transaction in the top right corner of the Transactions screen. You'll need at least one approved customer in the workspace to proceed.
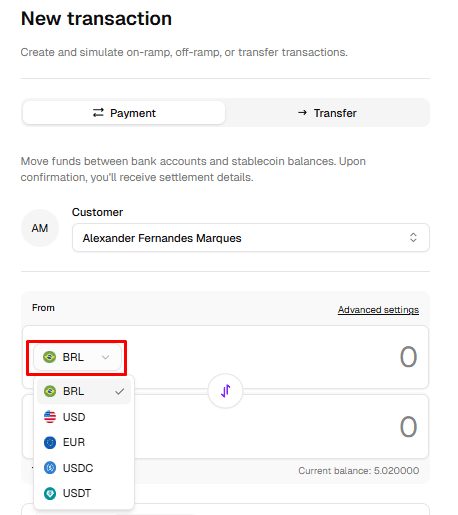
You'll configure:
The customer
The transaction type
The amount and currency
The destination (wallet or bank account)
As part of this flow, Lumx automatically prepares all required infrastructure before execution, including wallet creation when needed.
Network, Wallets, and Fiat Rails
During setup, you can review and adjust how funds will move.
For stablecoin transfers:
Wallets are automatically created for each customer, no manual setup or key management required
You can review the wallet that will send or receive funds
If needed, you may also use an external wallet address instead of the auto-generated one
For fiat transactions, the payment rail depends on the selected currency:
Currency | Available rails |
USD | ACH, Fedwire, SWIFT |
EUR | SEPA |
BRL | PIX |
MXN | SPEI |
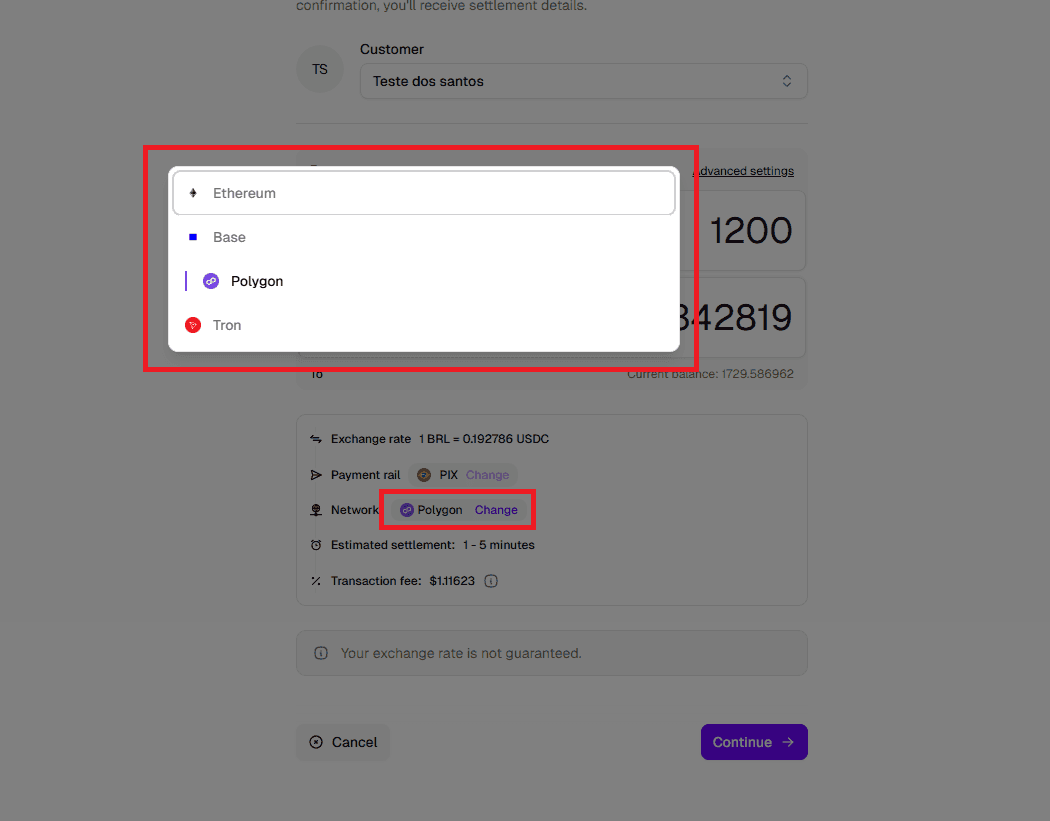
You can also change the blockchain network used for a given transaction before confirming.
For fiat transactions that require deeper reconciliation or dedicated banking details, Lumx also supports Named Virtual Accounts, providing unique fiat account details per business or customer.
Advanced Settings
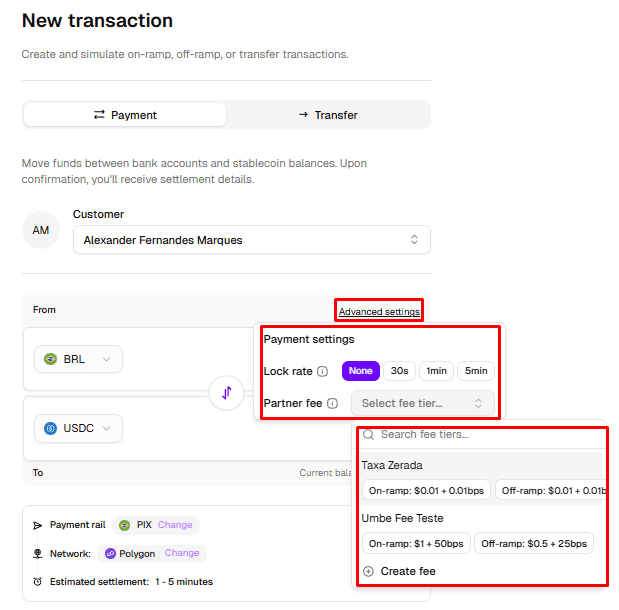
Before confirming the transaction, you can access advanced configuration options:
FX mode:
Floating rate — real-time pricing at the moment of execution
Locked rate — fixed quote for a defined time window (30s, 1min, or 5min)
Partner Fee — apply a configured fee tier to the transaction
These settings let you control pricing predictability and apply monetization directly at the transaction level.
Transaction Summary and Purpose
Before confirmation, the Dashboard presents a Transaction Summary showing:
Origin and destination
Exchange rate
Selected blockchain
Payment rail
Estimated settlement time
Applied fees
At this stage, you must also select the purpose of the transaction, such as:
Personal account
Trade transactions
Professional services
Expenses reimbursement
Taxes, loans, or investments
This information is required for compliance and reporting.

Confirmation and Execution
Once confirmed, the transaction enters its execution flow.
In
Sandbox, transactions are confirmed automaticallyIn
Production, execution depends on funding, selected rails, and compliance checks
While most Sandbox transactions complete automatically, some may intentionally return a failed status. This allows teams to test error handling, edge cases, and recovery flows before moving to Production.
Transaction Lifecycle and Status
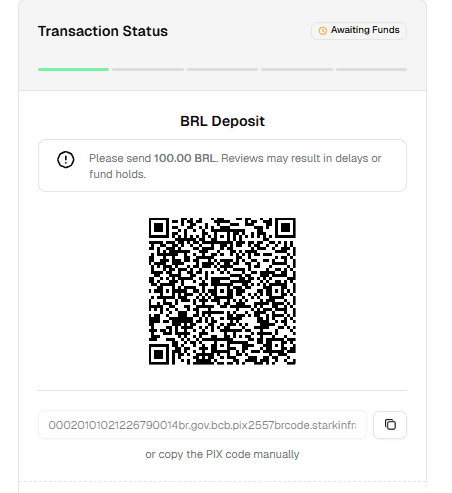
Each transaction progresses through clear, observable stages:
Status | Meaning |
Awaiting Funds | Payment instructions delivered; waiting for incoming funds |
Processing | Funds received; transaction being validated |
Transferring | Stablecoin movement in progress on-chain |
Success | Transaction completed and settled |
Failed | Transaction could not be completed |
Refunding | Funds being returned to origin |
All status changes are updated in real time.
Transaction Details and Monitoring
Clicking into a transaction opens the Transaction details view — a single source of truth for operations, finance, and compliance teams. This screen includes:
Transaction overview — amounts, currencies, network, rail, and timestamps
Transaction tracking — step-by-step progress from funding to settlement
Risk score — automated risk assessment for the transaction
Transaction breakdown — source and target currencies, amounts, and fees
Receipts — downloadable proof of transaction completion
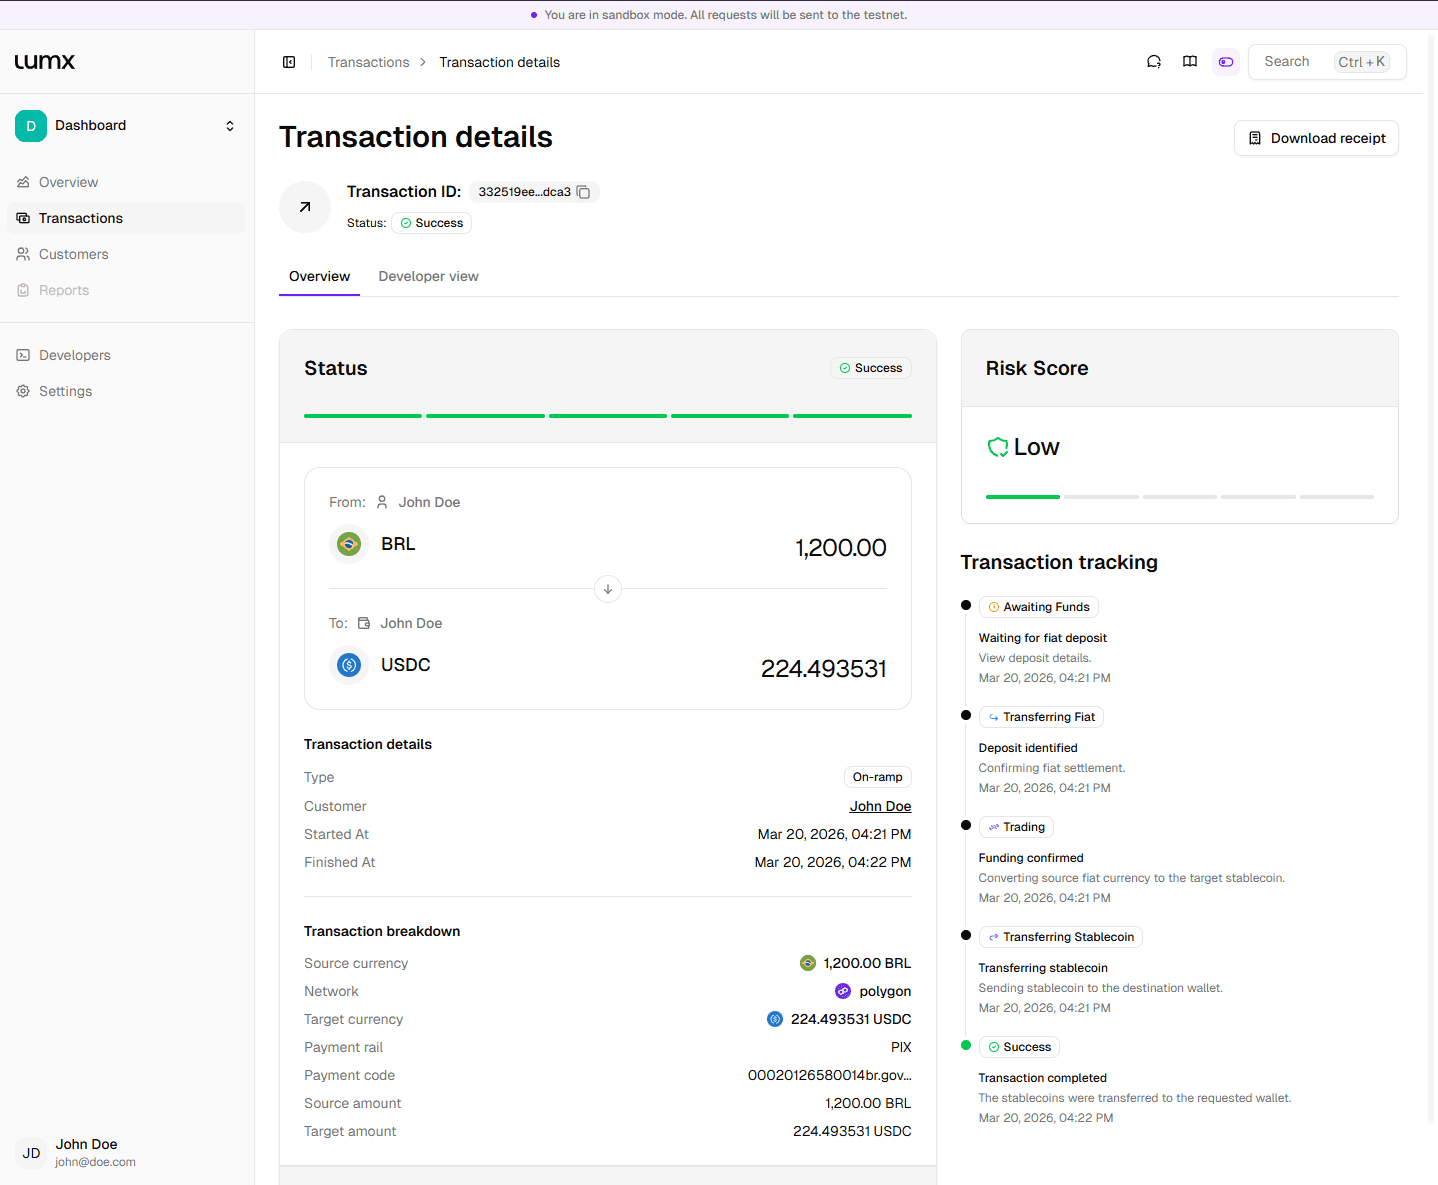
A transaction is where configuration, compliance, and execution converge into money movement.
A Living Document
This guide reflects the current capabilities of the Lumx Dashboard, but it is not static. As new features, rails, and controls are released, first in Sandbox, then in Production, this document will continue to evolve alongside the product.
Consider it a living reference for teams operating stablecoin payments at scale.
What to Do Next
You now have everything you need to:
Navigate the Dashboard confidently
Create and verify customers
Configure and run transactions
Test flows safely in Sandbox
At this stage, most teams move to a guided onboarding process. Going live in Production is not a switch — it requires:
Review of your use case
Compliance and risk approval
Configuration of limits, rails, and permissions
Alignment on operational and reporting flows
This ensures every production environment meets the same standards of security, governance, and regulatory compliance.
Ready to move beyond Sandbox? Get in touch with the Lumx team to start your production onboarding and approval process.
The Lumx Dashboard is built so operating money feels as simple as operating software — with the controls and guarantees required for real-world financial operations.


